Showing posts with label large painting. Show all posts

Monday, March 21, 2016

Finally! Finding Faith Project Unveiled: the Video, Photos and Painting


Over a month in the making, and my "Finding Faith" project is finally finished! I named it Faith is Waiting For Spring and it is a three part art project using painting, video and photography to tell a simple story.  I have always loved to dabble in photography and with my new-found love for videography, I had the idea to connect them with my painting and this is what materialized.  

I really hope you enjoy the video and photos and especially the surprise ending in the painting!
:)

 FULL details on the making of this project are below for those of you who want to know more.  I know who you are and it was written for you.  

Thank you for looking!

♥ Lisa


*----------------------------------------*-------------------------------------*

***
Faith is Waiting For Spring
***


Video: click to play


Faith is Waiting For Spring
oil on canvas
30 x 24 inch

*-------------------------------------*----------------------------------*

 Details About the Project

working in the studio
As you know, if you follow my art, I am a figurative and narrative painter and often paint intuitively (where the story unfolds by itself as I paint) or by creating scenes using vintage photos.  However, I had a new idea for my approach and that was to create the story with the use of video and photography, and then attempt to paint it.   In all honesty, this whole concept started with finding the 8 mm app for my iPhone.  It is the same app I have been using to make my "Studio Clips" videos, and it has me hooked on video making.  It's kind of funny to me how such a big idea can come from such a small thing like finding an app, but that is what happened.  Plus I have always loved taking pictures, so this project provided a way I could sort of tie these arts together with my love of painting. 

  The video and photographs took only 1 1/2 hours to shoot, but took over 10 hours to edit because I was very picky and kept changing my mind about the clips of video I wanted to use. Plus, selecting the music took a while.  I needed something slow since the whole theme was about Faith waiting for "Spring" to arrive. It is amazing how music can make or break the mood!

My beautiful niece, Faith was my gracious and willing muse and we did the shoot in an open field in the middle of Benton, Kansas.  I found her dress and the small props at a thrift shop,  borrowed the table and chairs, and  I made the flower crown myself.  I was pretty excited the day of shooting because everything turned out exactly as I had envisioned and the weather was perfect!  

My friend and gallery owner Teressa Sliger helped me locate the property after I sent a text to her one day to ask if she knew of any "Andrew Wyeth-looking places" out in the country where she lives. (My all time favorite painting is Christina's World, and the Kansas landscape looks exactly like that painting). So Teressa took me driving around one day trying to locate the perfect spot for my project and I ended up selecting the first one we saw.   I have to point out here what a great friend and support Teressa was to do this for me...indulging with me on my what had to seem like such a crazy creative whim.  She questioned me very little and just rolled with it.  Had she not done this, I might have just chucked the whole thing aside labeling it as a dumb idea, but her interest and enthusiasm helped push me forward.  Also, the property we chose was private property and we were not sure who owned it, so she offered to meet us out there on shooting day to keep watch for anyone that might question what we were up to.  We had to lug the table and chairs a long ways off the road to the tree that provided the main part of our stage and Faith and I were a bit nervous about trespassing.  I  imagined poor Faith being hauled off to jail in her pretty dress and flower crown, and me having to explain to her mother what had happened.  But having Teressa there helped us relax as we worked.  She assured us it was not a big deal to be out there and it wasn't.  We never saw a soul for the entire hour and half we were there.

After the photos and video were complete I busied myself in the studio attempting to capture the scene in the painting.  Since I do not paint realistically, this was a challenge for me.  I had to keep reminding myself that my job was to capture the essence, not every single detail.  Also, I knew from the start that I could not make Faith look like Faith.  I had already tried painting her face over and over again in my sketchbooks.  I decided that if I could at least capture the scene with just a likeness of her I would be happy.  I worked in oil because it is easier for me to make adjustments.

   Being outside, collaborating with people, taking photos, shooting video...it was such a fulfilling way to work in art!  Plus working with all the images from the photos and video,  and physically having been in that location provided a lot more information for me to work with, which for some reason seemed to make the painting process flow more easily. However, I can't always work this way because it is so involved.  From time to time though, it will be fun and I love the challenge.

Didn't Faith do an incredible job?  She is a natural beauty and she just knew exactly what I was wanting for the video and photos.  She was such an easy model to work with and I could NOT have done this without her!  We had so much fun that day and I am happy to say we are already scheming for the next project.  I just need to find a red flannel shirt somewhere.  :)

Thanks for reading.
xo

Friday, December 18, 2015

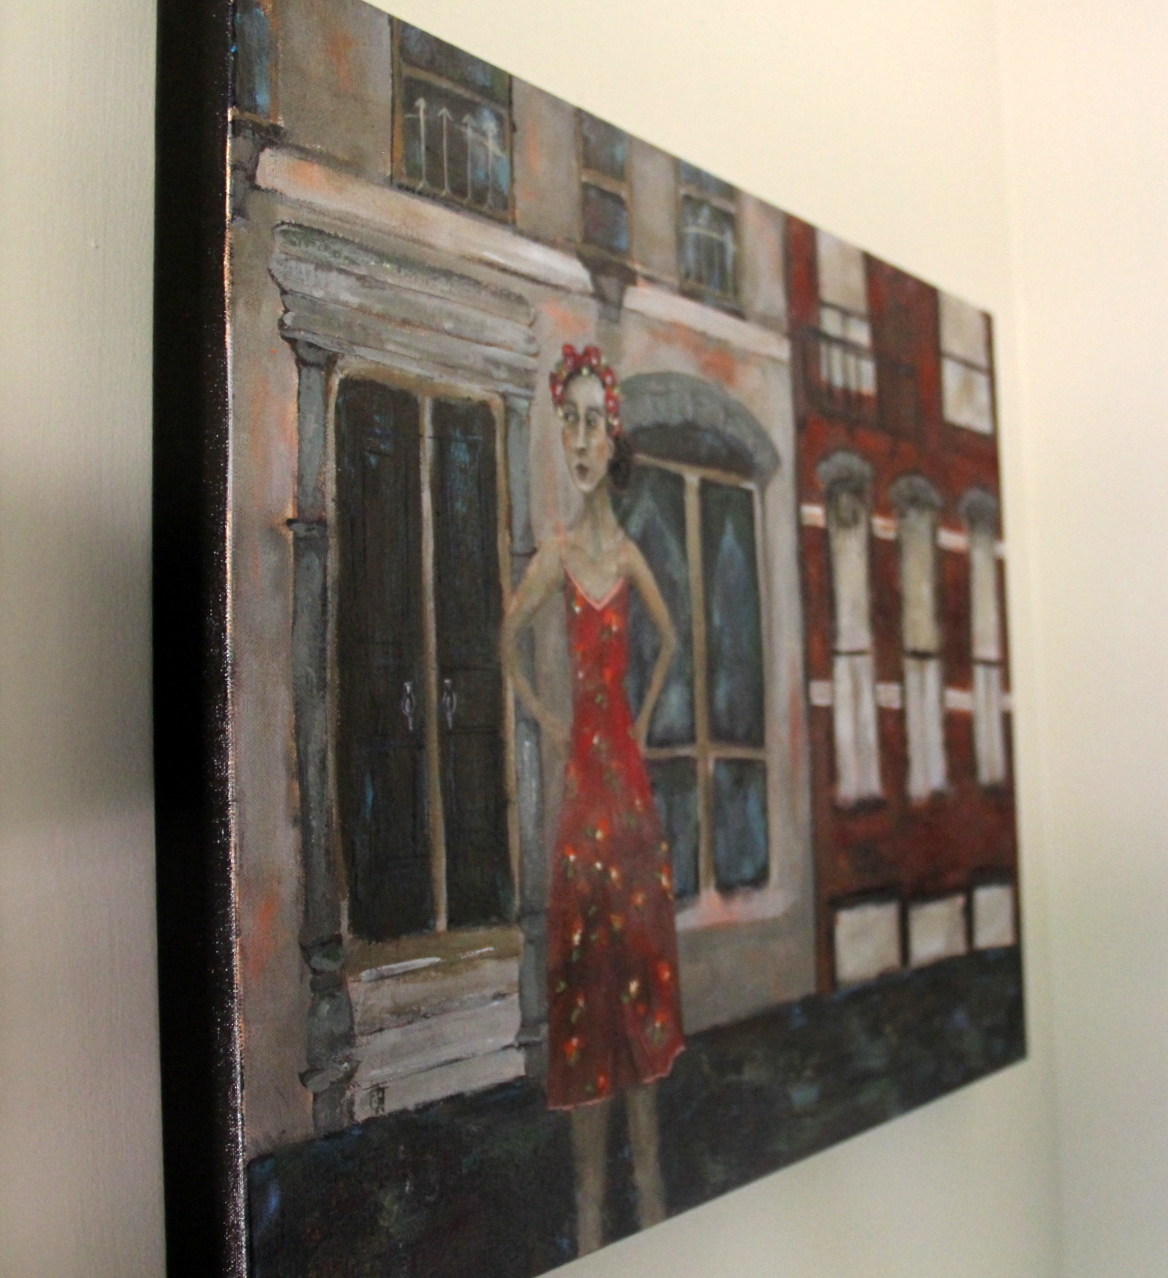
Cafe in Tribeca

Cafe in Tribeca
mixed media on canvas
24 x 30 inch

My last large painting for 2015, and also my largest work all year. It is always so freeing to paint on such a big surface.  I just dropped this off at Tessera Gallery where there will be an open house tonight with artists in their studios working and live music.  I will be painting in the classroom there and I look forward to seeing everyone.  We hope to have a good crowd tonight as this will be our Final Friday since the actual Final Friday falls on December 25.


charcoal on paper
16 x 20 inch


I attended a recent all-day abstract drawing workshop taught by Wichita artist Brian Hinkle and one of the drawings I did in his class is very much a part of the inspiration for my painting as you can probably see. Though I did not realize it until I was almost done.  The image was obviously tucked back in my brain as I worked.


Best coffee ever at an organic cafe
in Tribeca


I think what also inspired my painting was the amazing organic coffee I had at a cafe in Tribeca while we were in New York City.  Amazing what a cup of coffee can trigger.

I hope you all have a wonderful weekend.

♥ Lisa

Monday, March 10, 2014

Grandmother's Garden


Grandmother's Garden
mixed media on 24 x 24 inch wood

Not too long ago, a very generous and thoughtful person contacted me and asked me if I would be interested in taking some vintage photos off of her hands.  She said she had quite a collection, but would never be able to use them all and wanted to find good homes for them.  I had no idea I would receive so many and I teared up looking at them...so many past souls...men, women, children, families...and no one knows who they are anymore.  These photos are a treasure and I can't thank this person enough for thinking of me as a recipient.

For those who are interested in the process for this piece, read on...otherwise just skip to bottom of this post to see the photo that inspired this painting.

So about the process...

For this larger painting I wanted to try a combination of all the different techniques that have worked well in the past.  These are techniques that I love and frequently use, but not necessarily all at once.  I wanted to be sure to use all my favorite mediums.

Here is the shopping list:

24 x 24 inch wood 1/4 inch thick (cut by Home Depot)
white gesso - 1 thick coat
acrylic paints
oil paints
matte gel medium
scrapbook papers
acrylic ink
glazing medium
oil pastel
colored pencils
sandpaper
palette knives
flat brushes
detail brushes
sponges


putting it together
The wood was primed with white gesso first and allowed to dry for at least 24 hours. I then painted the entire surface with acrylic just to get the wood covered in color.  I blocked in the buildings, ground, sky, tree and figure, and then started the face, chest and arms also with acrylic paint.  I picked my basic color theme ahead of time.  It changed some as the painting progressed, but stayed pretty close to how it started out.

I cut long strips of paper for the buildings...the shed papers being skinnier than the house papers.  I also designed her dress with various papers.   I had to use tracing paper to help me get the size of her dress correct (lay tracing paper over the figure, draw the dress onto the tracing paper, cut it out and then use that shape to help you cut the scrapbook paper).  There may be an easier way, but this is all I know.

 All of this...buildings and  her dress were laid out while the board was flat.  This way I could stand over it and decide if the composition worked or not before gluing it down.

Just FYI:  Did you know that there are copyright laws for scrapbook paper?  The papers I use in my art come from large pads manufactured by Michael's Arts and Crafts and Hobby Lobby.  I checked with them a long time ago and they said that their paper is okay to use in art that will be sold...but you can't reproduce the paper to sell.  However, a lot of the singular sheets and other books of paper you buy have a copyright and you cannot use those in art that you sell unless they give you permission.

detail
Back to the painting...over time I have decided that painting faces with oil is easiest because it can be blended so smoothly.  Plus I just love the way it looks...so soft.  Her face, neck, chest and arms are all finished in oil, but underneath is acrylic.  Her hair is in oil too.  I smeared in on with a palette knife and then slice into it creating a more stranded look.  Her hair bows are in oil also...those were the very last thing I added.

detail
The grass is layers and layers and layers of acrylic paint and I had to get it right before the big white flowers were added.  Again, the shed is cut strips of paper.  I glazed over the buildings with a sheer earthy orange-brown.  The roof of the shed was painted and sanded, painted and sanded.  Sanding is a great way to add light to an area.  I also painted the table and chairs and added a few dots of different greens to make it look like a vine...keeping it very simple.


detail
I lucked out with the paper for the house...it is a wood grain pattern and as I laid glazes over it, it looked more and more like wood.  I kept spaces in between the strips of paper and this really added depth to the house.  When I first put the strips down, I put them against each other, but it didn't look right.  That's why you want to check your composition before gluing down the paper.  It takes time to get it to look right.  (I used the gel medium as my glue.) The windows are painted, there is no cut paper there.  

detail
The most tedious part was cutting all these little leaves with an X-ACTO knife and then gluing them down.  I was going to paint the leaves, but the cut paper leaves seem to add to the depth and tie in with the buildings really well, giving the whole work a new cohesiveness.  I went over and over these little papers with the matte gel medium and also transparent green glazes so those little pieces won't come off.


detail
I rubbed a thin layer of brown acrylic ink over her dress which gave it an antique look.  This is one of my favorite things to do to my art.  I learned this trick from Jane Spakowsky's class two years ago and I use it often.

The hardest part of this whole painting were those darn white flowers.  I have so much trouble painting flowers that look good.  I was finally happy with them after tracing the acrylic petals with oil pastel and going over stems and leaves with colored pencil.  That seem to do the trick by adding light to good places, but let me tell you they were tough to do because once they were down, it was a commitment since the rest of the painting was already finished. I think my heart skipped some beats prior to making that first mark of the petal...I was so afraid of ruining what was already done!

Thankfully it all worked out!

the muse
And here she is...the soul that inspired this piece.  Isn't that the sweetest smile?  I wonder who she was and where she is here and who took her picture.  Don't you?

More photo-inspired paintings to come.

♥ Lisa

PS:  Vic and I are celebrating 24 years of marriage today!  

Friday, August 30, 2013

Ragamuffin Rena

Ragamuffin Rena
papers, gel medium, acrylic, glazing medium and ink
16 x 20 inch on stretched canvas

So which one is Ragamuffin?  Bet you can't guess.  I was excited about this painting and couldn't wait to show you, my blog friends.  

I hope tonight...for the opening reception at my show I look a little more like a Rena than a Ragamuffin. I think Rena has a better chance at selling art, don't you? :)

Huge warm hugs, thank yous, and high fives to all of you for the good luck wishes. I appreciate you all so much and I will be imagining you are there with me tonight.

♥ Lisa

PS:  I won't be doing a Share Sunday post this weekend...need some rest.

Tuesday, August 20, 2013

Spanish Harlem is Finally Finished!

Spanish Harlem
oil, acrylic, tea bag (the dress) , ink, gel, glaze, oil pastels, Pitt pen
on 24 x 18 x 1.5 inch canvas
SOLD

I have been a painting maniac lately and I probably have about seven paintings I could post, but Spanish Harlem deserves a post all its own because it was a bear-of-a-painting to do.  Lots of lines in the buildings, every little crevice and corner calling for a different tone or value from the other.  Oh how I wish I had this color thing down, but I am self taught and it is what it is.  However, I am happy with it. 

detail of Spanish Harlem

With this painting I learned don't like to work with oils on such a large surface or on canvas.  I prefer oil on paper and for right now probably on a surface no larger than a 9 x 12". Oil overwhelms me, which is why this painting came to a screeching halt after the block-in was done.  I have much more control with acrylic and it's so much easier to wipe away mistakes.  However, oil is so blendable and the soft look of them is so pleasing, so I will keep working with those too.   

testing it out on the wall

So that's that.  Done!  

looks so different in outdoor light

Happy Tuesday!  Thank you for all your kind comments and visits.  I love hearing from you and I am doing my best to reciprocate.  Without you, there would be no point to this blog.

♥ Lisa

Monday, May 13, 2013

The Backyard Bench

The Backyard Bench
24 x 24 inch mixed media on stretched canvas

Back to a large painting surface again...trying to get some pieces ready for upcoming shows.  On the 1 -10 Happy Scale I give this painting a 9.5.  Not that I am any sort of artistic genius or anything, but I am so thrilled with this one because so many things turned out just as I had hoped without a lot of fight or my usual self doubt.  I used a vintage photo as a loose guide for the composition.  For the colors I initially went to a Camille Pissarro painting that I love to help me get started, but once the foundation of this painting was put in place, I went out entirely on my own and instinctively chose the colors.  

Here are some close-ups so you can see the details better.


I hope all you moms, moms-to-be, and motherly types had a beautiful Mother's Day.  It was a lovely weekend here in Kansas...lots of flower planting,  phone time with my oldest son and a nice walk with my youngest son yesterday.  My mom's birthday dinner was a blast and she just glowed the whole weekend.  Thank you for all your sweet comments and birthday wishes for her.  She has been reading them and you have made her feel really special.  

Have a great start to the week!

♥ Lisa

Friday, February 22, 2013

The Difficulties of Painting on Wood: A Look at the 2nd WIP


The title of this blog post should actually say "The Difficulties of Being Self Taught".  This is my second large acrylic painting on a 24x48 inch piece of wood.  I am not sure what type of wood it is, but it is definitely not that wonderful birch I painting on in the last post.  Live and learn.  This wood is so much more porous and getting coverage is really really really taking a lot of paint.  I put gesso down prior, but it probably would have taken a gallon of it to cover this wood properly.

I like the overall composition and the colors, but there are so many things I don't like and I am not really sure how to fix them without just painting certain parts over.


 I am okay with the way her face turned out...the shading is difficult, but this is nothing new for me.  What is annoying is that line you see by her left eye which I believe is from the wood grain.  I didn't even notice it until I took the photo.  The only way to change this is more coverage and I think it would take a lot of paint and then I would lose what I have.  Also, I can't figure out why there is so much glare?  Is it the acrylic paints?


 This is the floor...TOO RAW...but I have no clue how to make it better or to finish it.  I thought about painting borders around the squares in kind of a Klimt-ish style...but then it would tighten the work and I am trying to loosen up.


And her hands are too small.  If I paint larger hands I think I would have to entirely change the mattress and you would not believe the amount of time it took to get it to the point it's at.  It was a white blob for a long time and now at least it sort of looks like a mattress.

I am seeing now that this is why they say an artist should draw, draw, draw.  If you do this you have a much better chance at having proportionally correct hands and mattress edges.  :)

In a nutshell I need to decide if it's finished. Should I leave it raw looking and accept that it is likely the wood that is my problem (if it is a problem) ...or does it really NEED more and I will just have to risk losing the things I DO like about it and keep on painting it.   It may be a while before I decide either way.

♥ Lisa

PS:  Look what we got here in Wichita, Kansas!  We set some records...second largest snowfall from a single storm in recorded history...over 14 inches!  I leave you with a few images of our winter wonderland.  Even though most of us are feeling ready for Spring, it is hard to deny the beauty of snow and the fun it brings, especially to an area of the world that sees so little of it.
Our cat Bean leading the way for Hurley through tire tracks. Bean is the more seasoned pet of the two.

View from my studio window

Female Cardinal

Male and female Cardinals

Hurley our Golden Retriever... and his nose

After shoveling, shoveling, shoveling...I tried my hand at sculpting. Not bad, eh?  


Monday, February 18, 2013

Candela's Light and Painting on a Large Surface


Candela's Light
24 x 48 x 1/4"  acrylic on birch panel

  Recently I have seen and loved several pieces of art by various artists that paint on found wooden objects or wood panels.   After seeing these lovely works I decided to go to the hardware store to see what kind of wood I could find there.  It was surprising to find really large wood panels for less than ten dollars.

It was not just the wood surface that provided so much joy in painting this, but the size of the wood.  How freeing it is to be able to paint with long quick strokes and dabs within the large spaces.  I may have even raised my heart rate a little while painting the archway with all the bending and swooping at the easel.  I even got to do a little bit of "yoga" on the floor as I worked on the rug at her feet. 


The second painting on a wood panel is already off to a good start.  I don't know what I am going to do with these works, but perhaps they will be for the show next year.  Problem is, I need to figure out how to frame these inexpensively or at least put hanging hardware on the backs of these.  Any ideas?

Below are some closeups of the work.  

Thanks for stopping by!

♥ Lisa

The photo above is a bit misleading in the lighting it shows.  However, I left it here because this is the look of light I was trying to achieve...a glow from the various lamps.  For some reason the photo shows it, but the painting unfortunately is not all aglow like I wanted it to be.  Painting light is above my skill level for sure.  A real challenge.